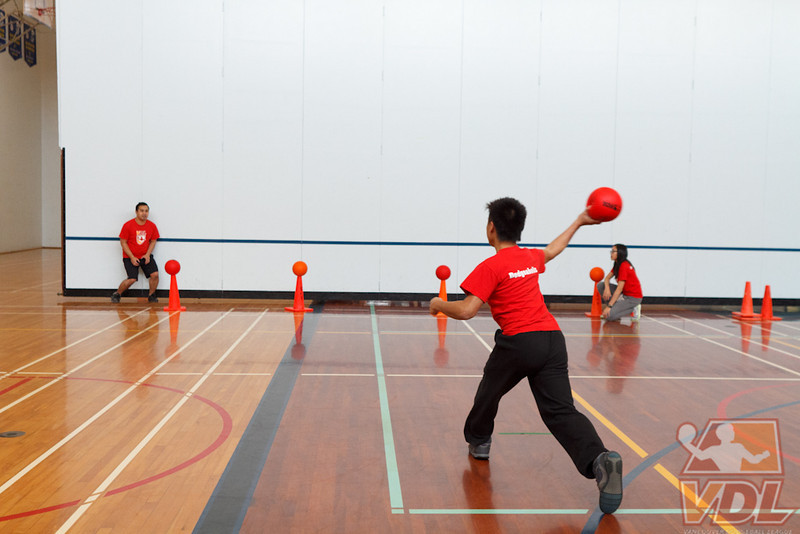
Dodgeball is predominantly a throwing sport. Naturally and unfortunately, shoulder injuries tend to occur. Rotator cuff injuries are one of the most common shoulder injuries caused by throwing.
Them Rotator Cuffs.
The shoulder is a ball and socket joint where the ball of the humerus joins with shallow socket of the shoulder blade. The analogy of a golf ball sitting on top of a tee is often used to describe this joint.
|
Figure A. Shoulder joint or otherwise known as the Glenohumeral joint. Adapted from http://www.sshla.com/services/Orthopedic-Surgery-including-Sports-Medicine/Joint-Replacement/Shoulder-1 |
The rotator cuff is a name for a group of four muscles, primarily responsible for holding the ball in the socket. To hold the joint together, each rotator cuff muscle works to anchor the humerus onto the shoulder blade. Of the four muscles, three (ie. Supraspinatus, Infraspinatus, and Teres Minor) are found on the back of the shoulder blade and one (ie. Subscapularis) on the front.
|
Figure B. Rotator cuff muscles of the right shoulder. Adapted from http://sportsphysiolondon.com/rotator-cuff-injury/ |
As mentioned before, the main job of the rotator cuff is to stabilize the shoulder joint. This stabilization is especially important during throwing, a complex movement involving lots of fancy words (such as high force, acceleration, deceleration, torque, rotation, mechanics, kinetic chain). For simplicity sake, I’ll describe the throwing motion in 3 phases (Smith et al., 2004; Pappas, 1985):
-
Cocking Phase
-
The cocking phase begins when you start to bring the ball behind you and ends when your shoulder is fully stretched or “cocked” and ready to throw.
-
The supraspinatus, infraspinatus, and teres minor muscles contract to rotate the arm back late in the cocking phase.
-
-
Acceleration
-
The acceleration phase begins as your arm starts to move forward from the “cocked” position and ends when the ball is released from your arm.
-
The rotator cuff muscles are basically inactive.
-
-
Deceleration and Follow-Through:
-
The deceleration phase begins as the ball is released from your hand and your arm continues to move across your body to follow-through after you throw.
-
During this phase, the rotator cuff muscles play an important role! Once again supraspinatus, infraspinatus, and teres minor contract to decelerate your arm so that your shoulder joint doesn’t dislocate.
|
Figure C. The 6 phases of throwing. Adapted from Seroyer et al., 2009 |
Injuries to the rotator cuff.
As described by Seroyer et al. (2009), “throwing is one of the fastest and most violent maneuvers to which any joint in the body is subjected”. The muscles and other structures of the shoulder joint must dissipate the high forces imposed on the shoulder joint once the ball is released and the arm starts to decelerate (Seroyer et al., 2009). Therefore, if there is weakness in your rotator cuff muscles, the intense loads placed on these muscles can lead to a variety of injuries such as impingement (ie. irritation of the tendon), tendinitis (ie. inflammation of the tendon), and tearing.
The symptoms for a rotator cuff injury vary between individuals and depending on the injury but may include:
-
pain with throwing
-
sudden pain with lifting and reaching movements
-
pain radiating from the front of the shoulder to the side of the arm
As the injury progresses, symptoms may worsen to:
-
pain at night and at rest
-
loss of shoulder strength and motion
-
pain and difficulty with reaching behind your back
If you are experiencing some of the above symptoms, it is best to go to a physiotherapist to get a thorough examination.
Below are some exercises often prescribed to strengthen the rotator cuff muscles to prevent injury. Although they may help, these exercises alone are not intended to rehabilitate an already injured shoulder.
Strengthening Exercises.
For each of the exercises listed below, try 10 repetitions. If you find it too easy, increase the number of repetitions to 12 or 15 or 20. Make sure that each exercise does not cause pain in the shoulder and only perform within your available range of motion.
|
1. Rows |
Adapted from http://www.tenphysio.com/article_throwers-shoulder.html
- Starting Position: Shoulders relaxed, elbows slightly bent
- Action: Pull the resistance band by using the muscles between your shoulder blades. Imagine trying to lightly pinch a pencil between your shoulder blades. Slowly return to starting position.
2. External Rotations
Adapted from http://www.tenphysio.com/article_throwers-shoulder.html
- Starting Position: Shoulder relaxed, elbow bent at 90°, wrist straight
- Action: Pull the resistance band by slowly rotating your arm outwards while keeping the elbow close to the side of your body. Make sure that you are rotating at the shoulder and not pulling with the wrist. Slowly return to starting position.
3. Abduction
Adapted from http://www.tenphysio.com/article_throwers-shoulder.html
- Starting Position: Arm by your side
- Action: Pull the resistance band by raising your arm to shoulder height. Make sure that you are not shrugging your shoulder. Slowly return to starting position.
——————————————————–
References
Meister, Keith. (2000). Injuries to the shoulder in the throwing athlete, Part one: Biomechanics/Pathophysiology/Classification of Injury. American Journal of Sports Medicine. 28(2).
Pappas, Arthur. (1985). Biomechanics of baseball pitching. American Journal of Sports Medicine.
Seroyer, S.T., Nho, S.J., Bach Jr, B.R., Bush-Joseph, C.A., Nicholson, G.P., Romeo, A.A. (2009). Shoulder pain in the overhead throwing athlete. American Orthopaedic Society for Sports Medicine. 1(2). doi:10.1177/1941738108331199
Smith, B., Lee, C., Solomon, D., Whitson, M., Chang, S. (2004). Mechanisms of Shoulder Injury. Retrieved Oct 11, 2013, from http://biomed.brown.edu/Courses/BI108/BI108_2004_Groups/Group01/mechRC.htm

